The question bank used in ATPdigital and BGS Question Bank is maintained by Bristol Groundschool. It is used to create Fixed Tests in the admin website, which may be viewed by students using the ‘exams’ tab in ATPdigital.
In addition, some schools have the facility to create and edit their own ‘school-specific’ questions. These questions are separate from the main BGS question database and may be viewed and used in fixed tests only by the school which created them.
The purpose of this guide is to show you how to create and edit school-specific questions. If you want to know how to put them, or BGS questions, into a Fixed Tests, have a look at this guide which deals with that subject.
Prerequisites
Before you can create or edit questions, you will need the appropriate user permissions. If you don’t have them, you will be unable to access many of the MRS features discussed in this guide. If you want the ability to create and edit school-specific questions, email [email protected] and ask us to change your user roles.
There are two user roles you can have assigned: School Question Editor and School Question Approver. One user may have both roles or just one.
| Note!
The purpose of having two levels of authorisation is to allow a school to exercise central control over question quality. Question Editors require a Question Approvers to approve their questions before they can be used in tests. |
Creating a new School Question
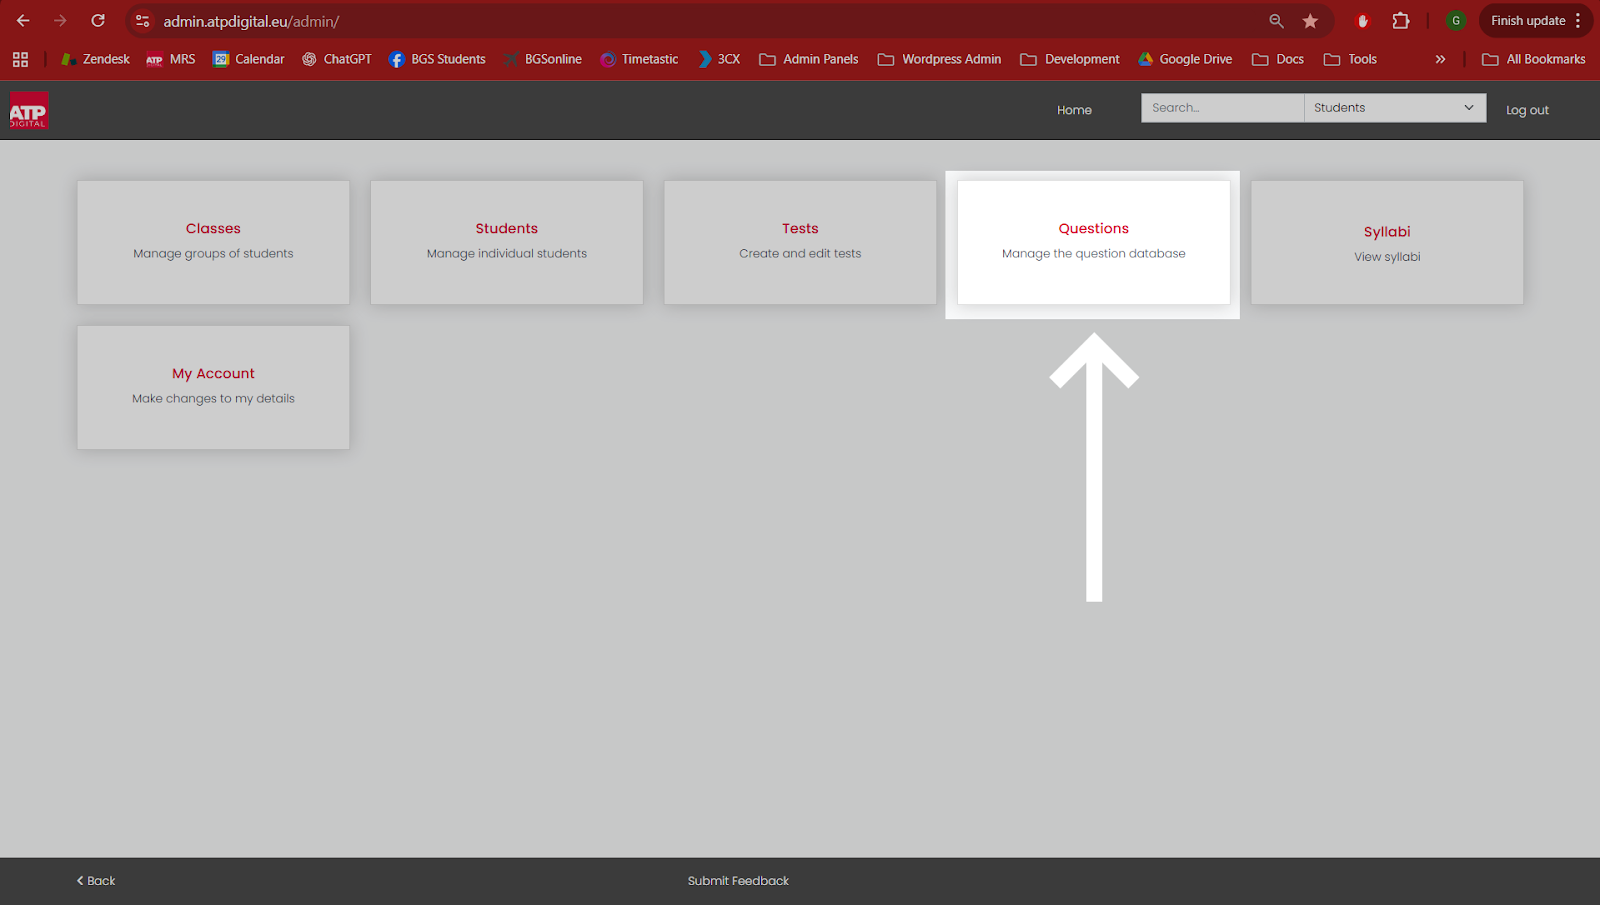
To get started, log onto the MRS at https://admin.atpdigital.eu/admin and select “Questions” from the home page.
You will see a list of all the questions for your school.
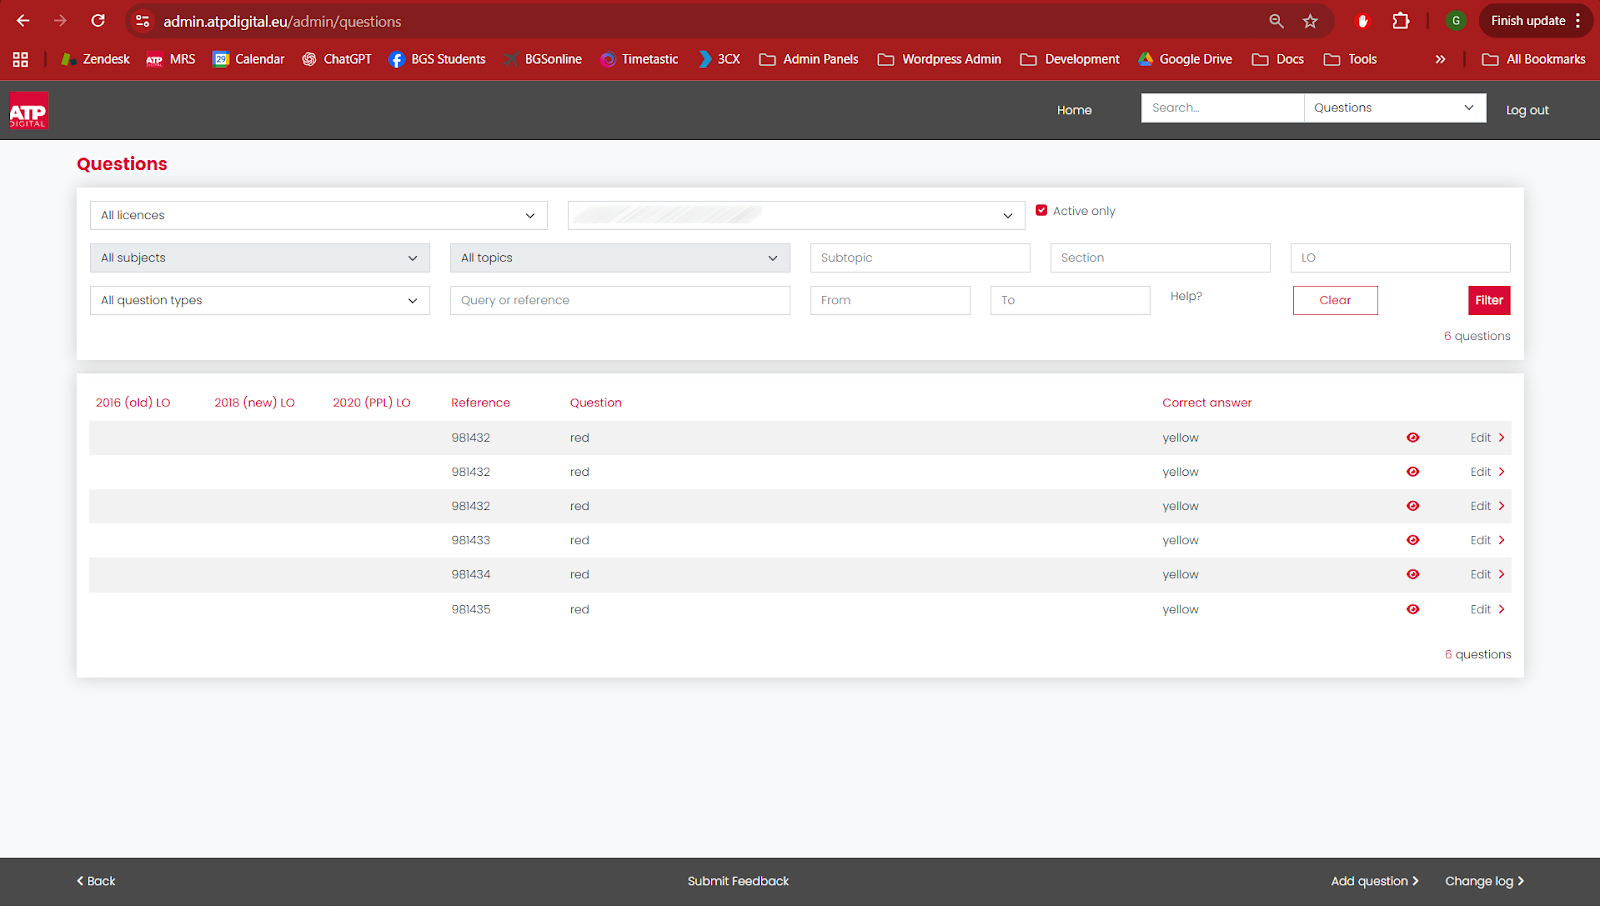
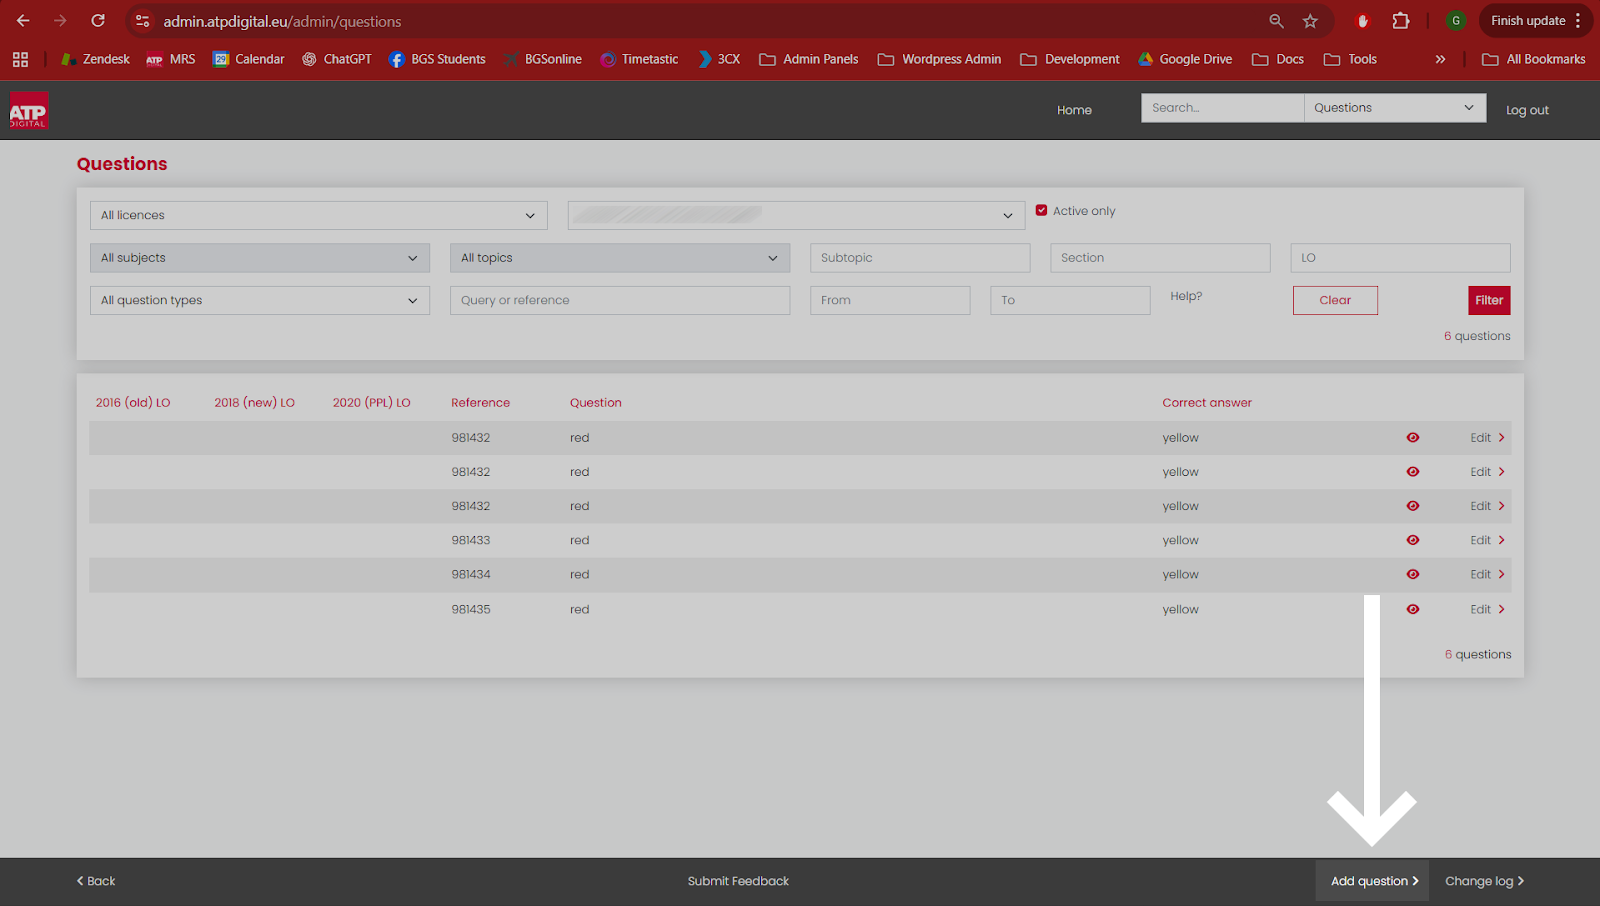
Click on ‘Add question’ at the bottom of the page to create a new question.
You will see a blank question details form.
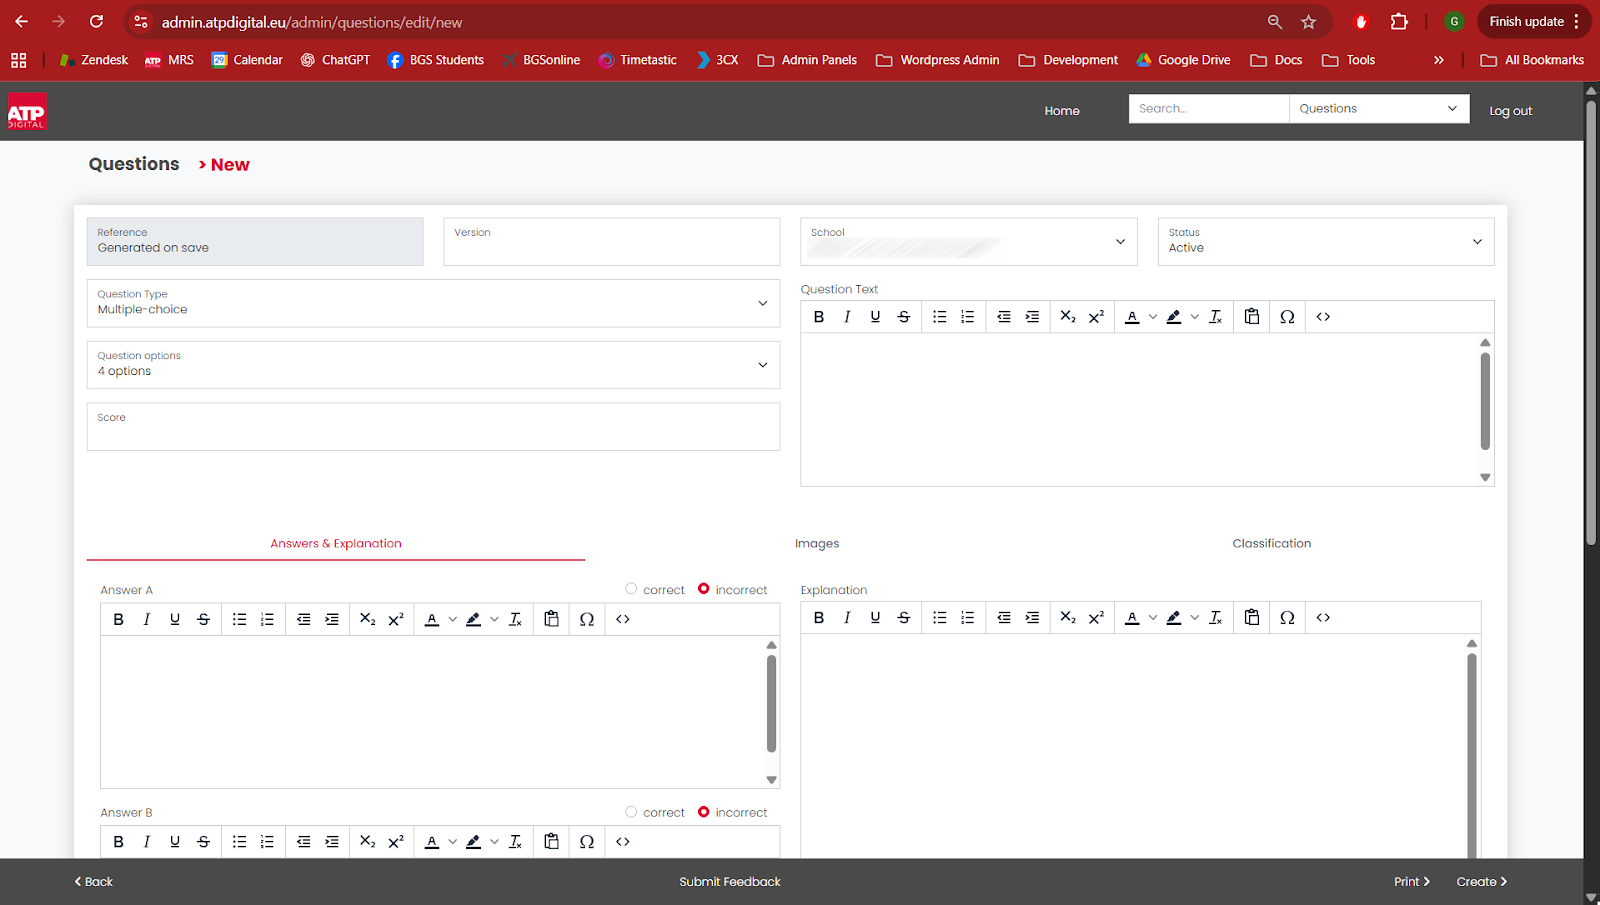
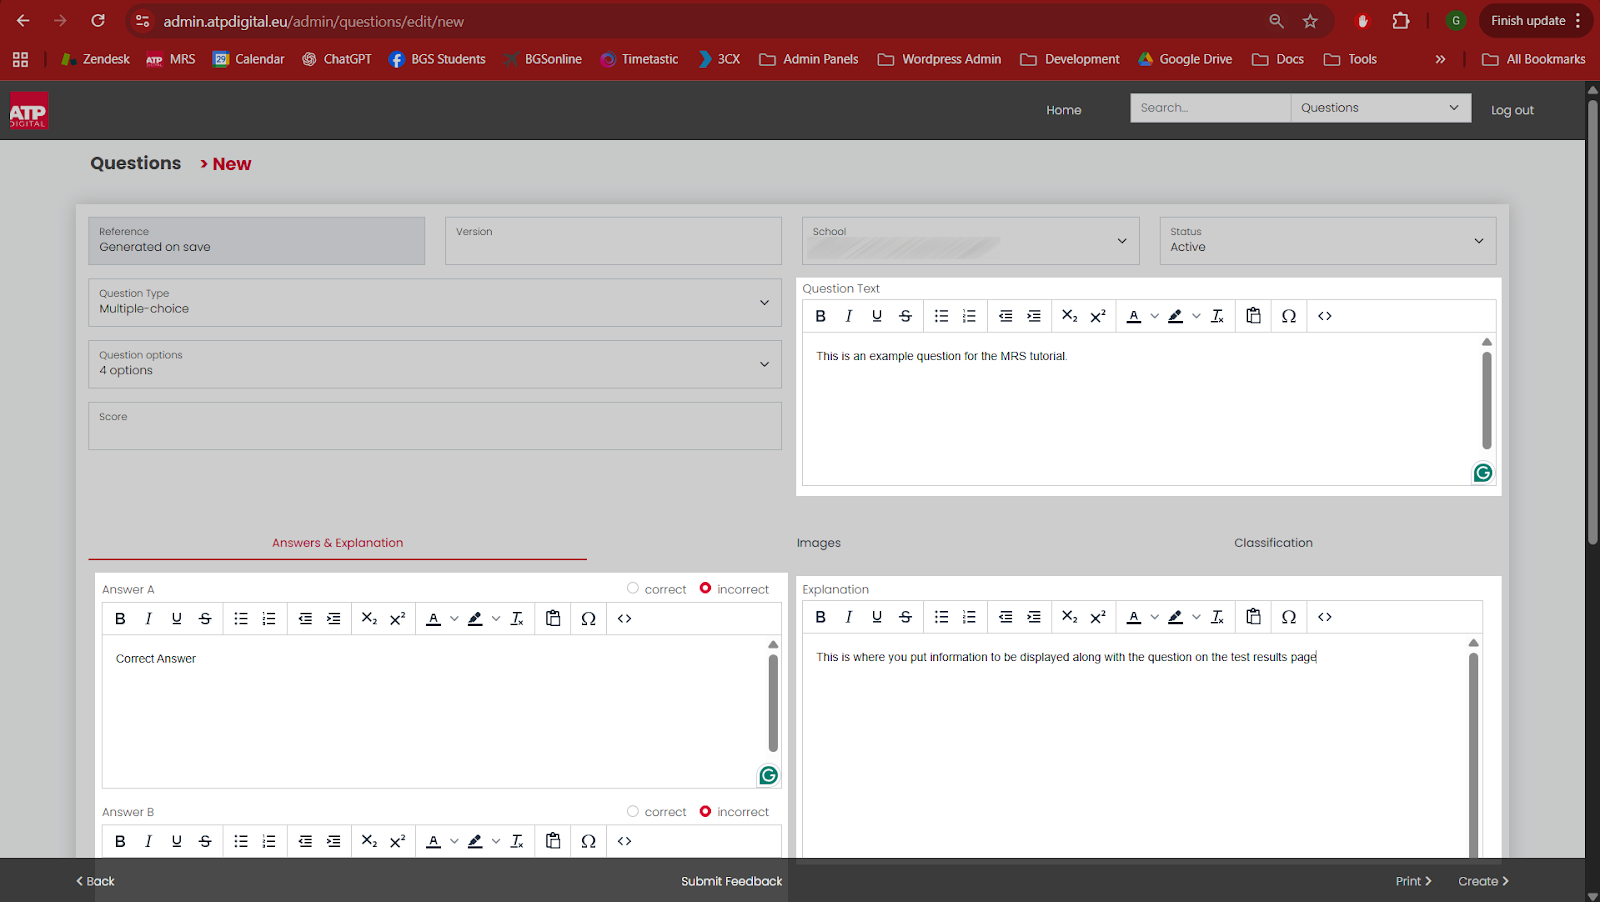
Enter the Question, Answers and Explanation text
| Warning!
Beware copying text from other sources, especially MS Word, as it may contain hidden HTML which will give you formatting issues when the question is viewed in ATPdigital.
If you do want to copy text, copy from your source, place your cursor in the question text box and select Shift|Ctrl|V which will paste your text without formatting. The paste button does the same thing.
If you do inadvertently copy in unwanted code, we’ll show you below how to view and eradicate it, but prevention is always better than cure! |

There are various formatting controls at the top of the box you can use to arrange the text in an eye-pleasing manner. Most of these are fairly obvious, but a couple warrant further explanation:
The Tx button will remove all formatting, which is useful if you forgot to clear unwanted code when pasting text.
The <> button is used to view the HTML for the text. Use this to look and see if there is just text or strange hidden characters. If there is, you can either delete it manually or use the clear text button.
| Note!
The clear code button Tx does not always get rid of unwanted code, so you might need to edit manually when viewing the source code <> |
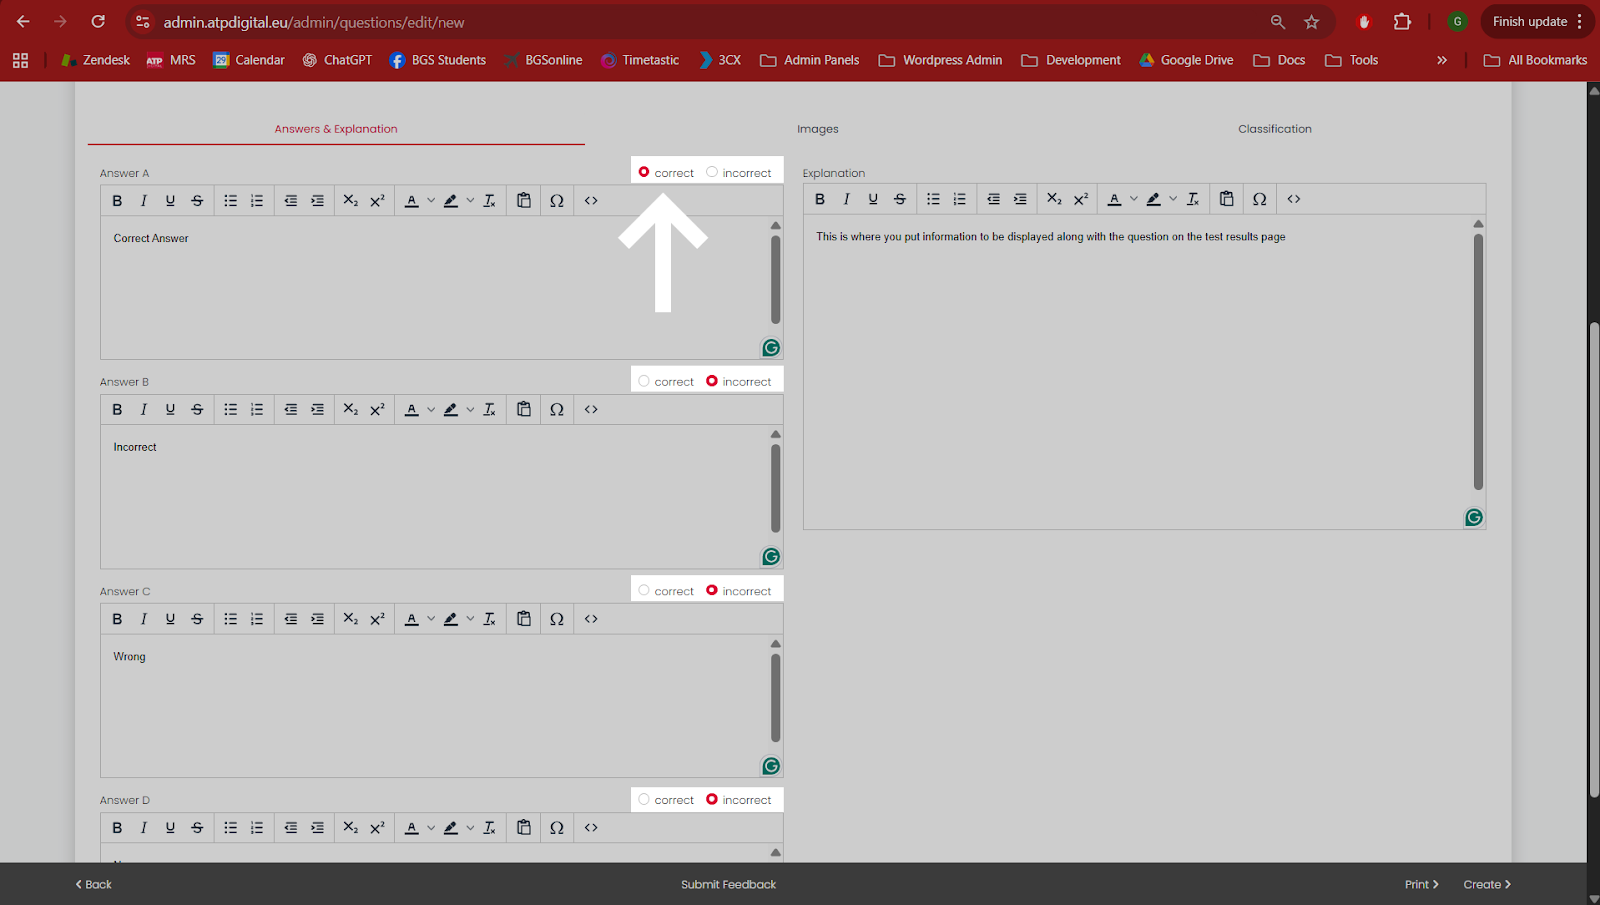
Use the radial buttons next to the questions to select which of the answers is correct (by default, no correct answer will be selected.)
You can also alter the score the student will receive for the question in a test (this can be used to add multiple marks for a question for something like a long calculation or planning exercise)
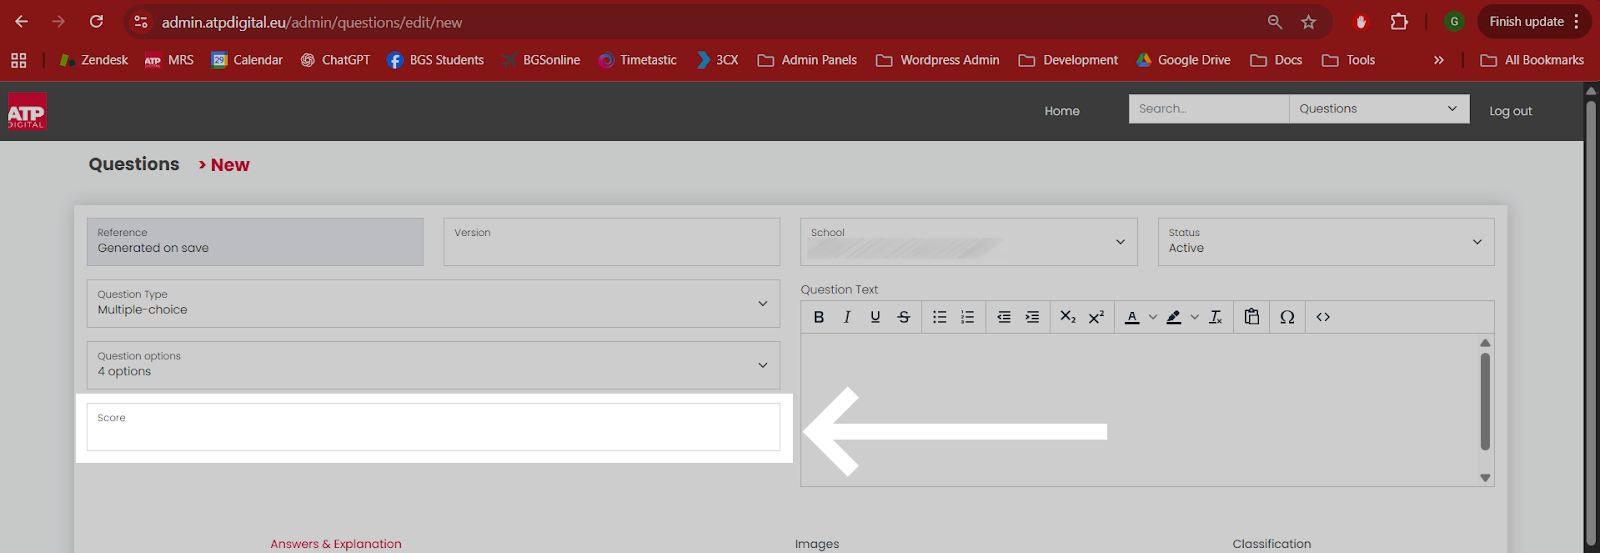
If you leave this field blank, the score will default to 1.
If you wish to add an annex image to the question or an image to accompany your explanation, click on the ‘Images’ tab
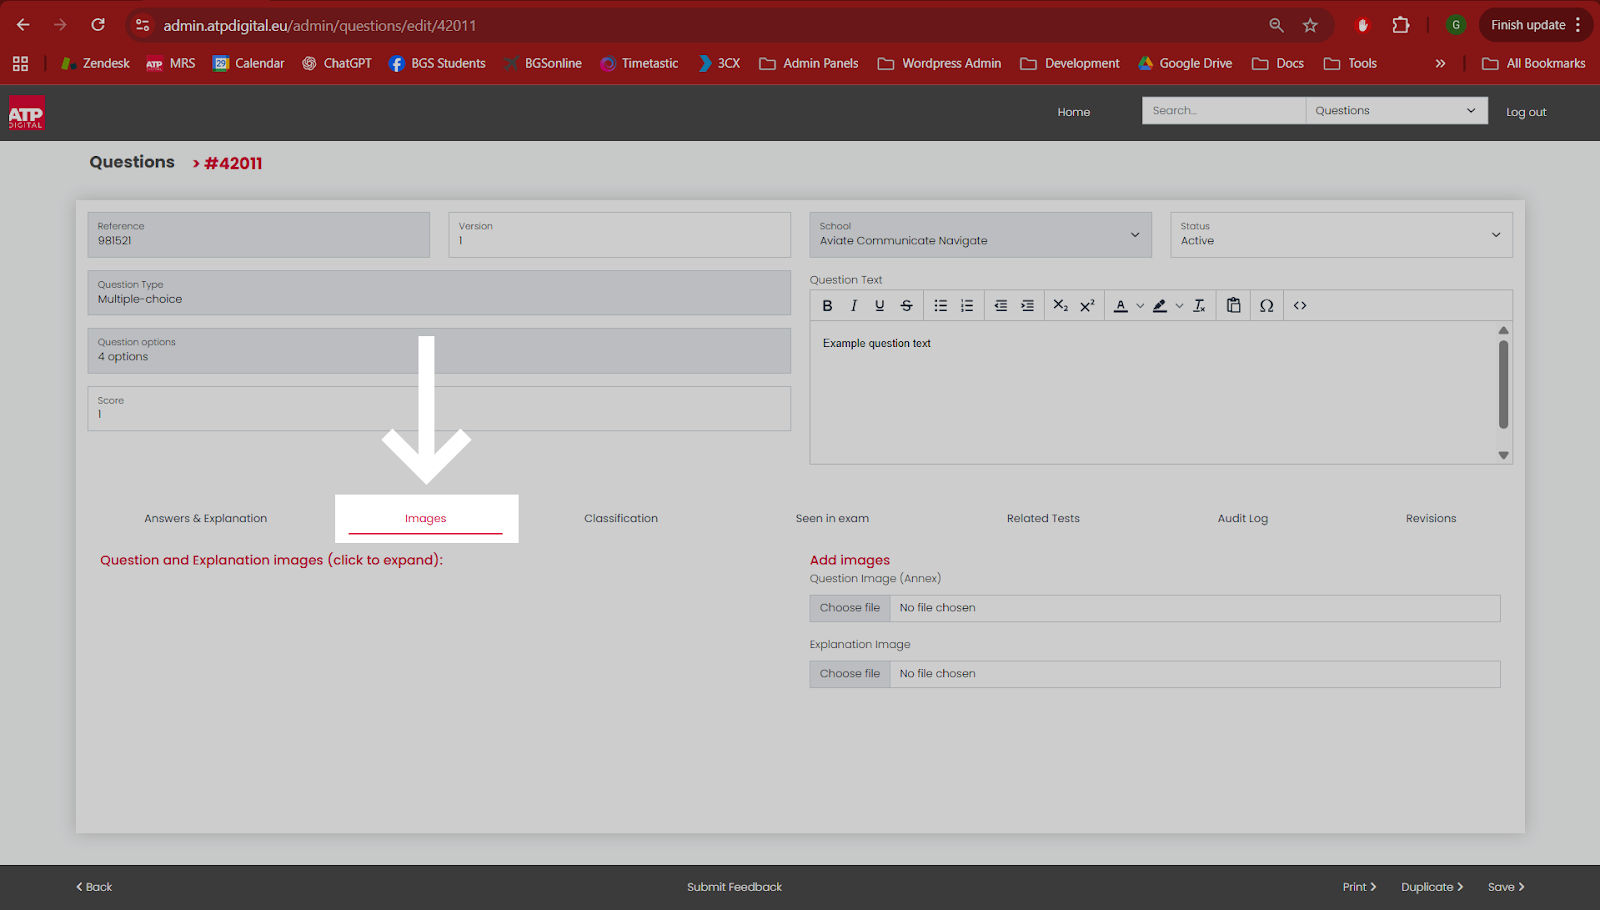
If there are any already uploaded when you are editing a question, there will be a thumbnail of the illustration(s) on the left.
| Note!
There are some rules you need to adhere to when preparing illustrations. The system will display only .gif, .jpg or .png image formats. If you have images saved in other formats, you will need to convert them before attempting to upload.
If you are not sure what you are doing, then we strongly suggest that you send the images you want to use to a professional who can prepare/convert them for you. We use a graphic artist who understands the constraints of our systems and has considerable experience in our industry, Paul Holt, [email protected], who will be happy to quote you for one-off jobs or multiple image preparation.
When you want to add a suitable illustration to a question, click the Question images‘Choose file’ button and navigate the the location where you have the image file stored. If you want an illustration to appear with the explanation, click the Explanation Image ‘Choose file’ button to find an upload your file. |
The final step is to allocate a classification to your question. Click on the Classification tab to see the options.
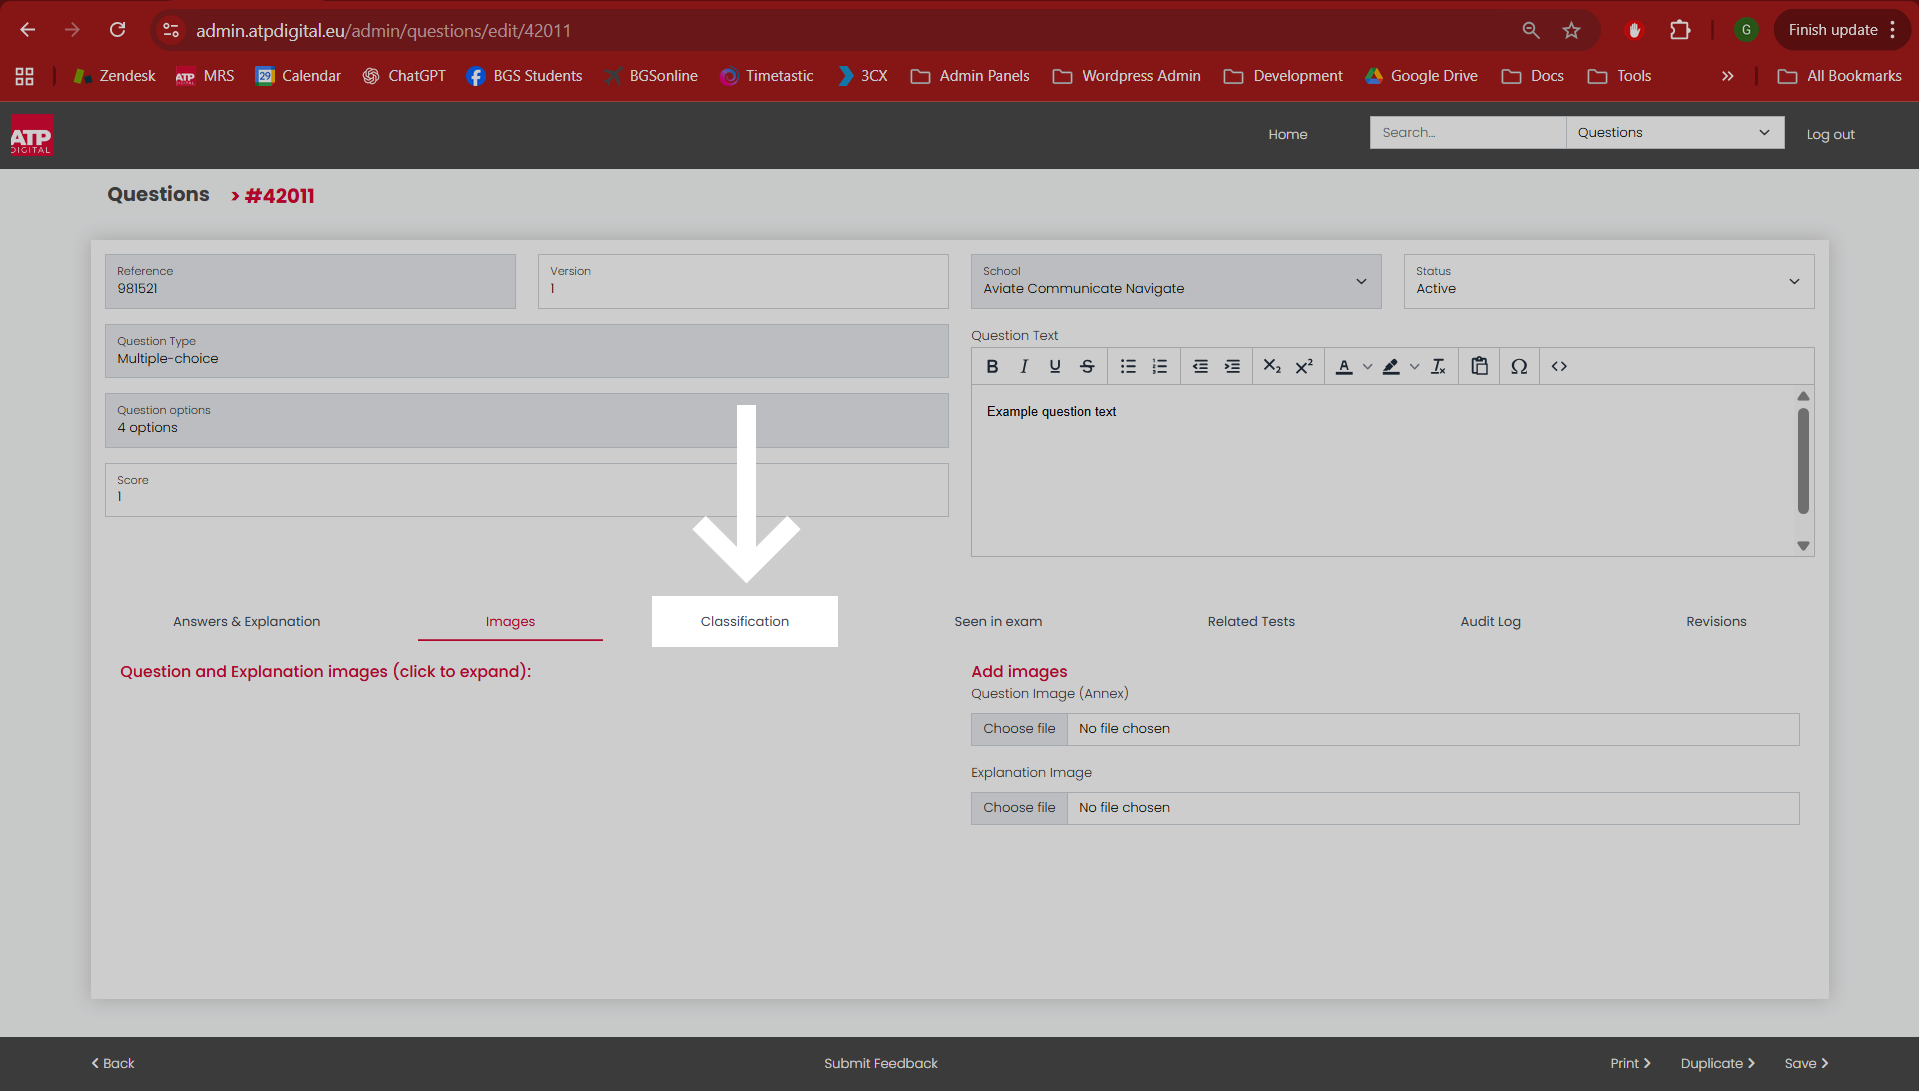
Start by selecting the Source and LO set
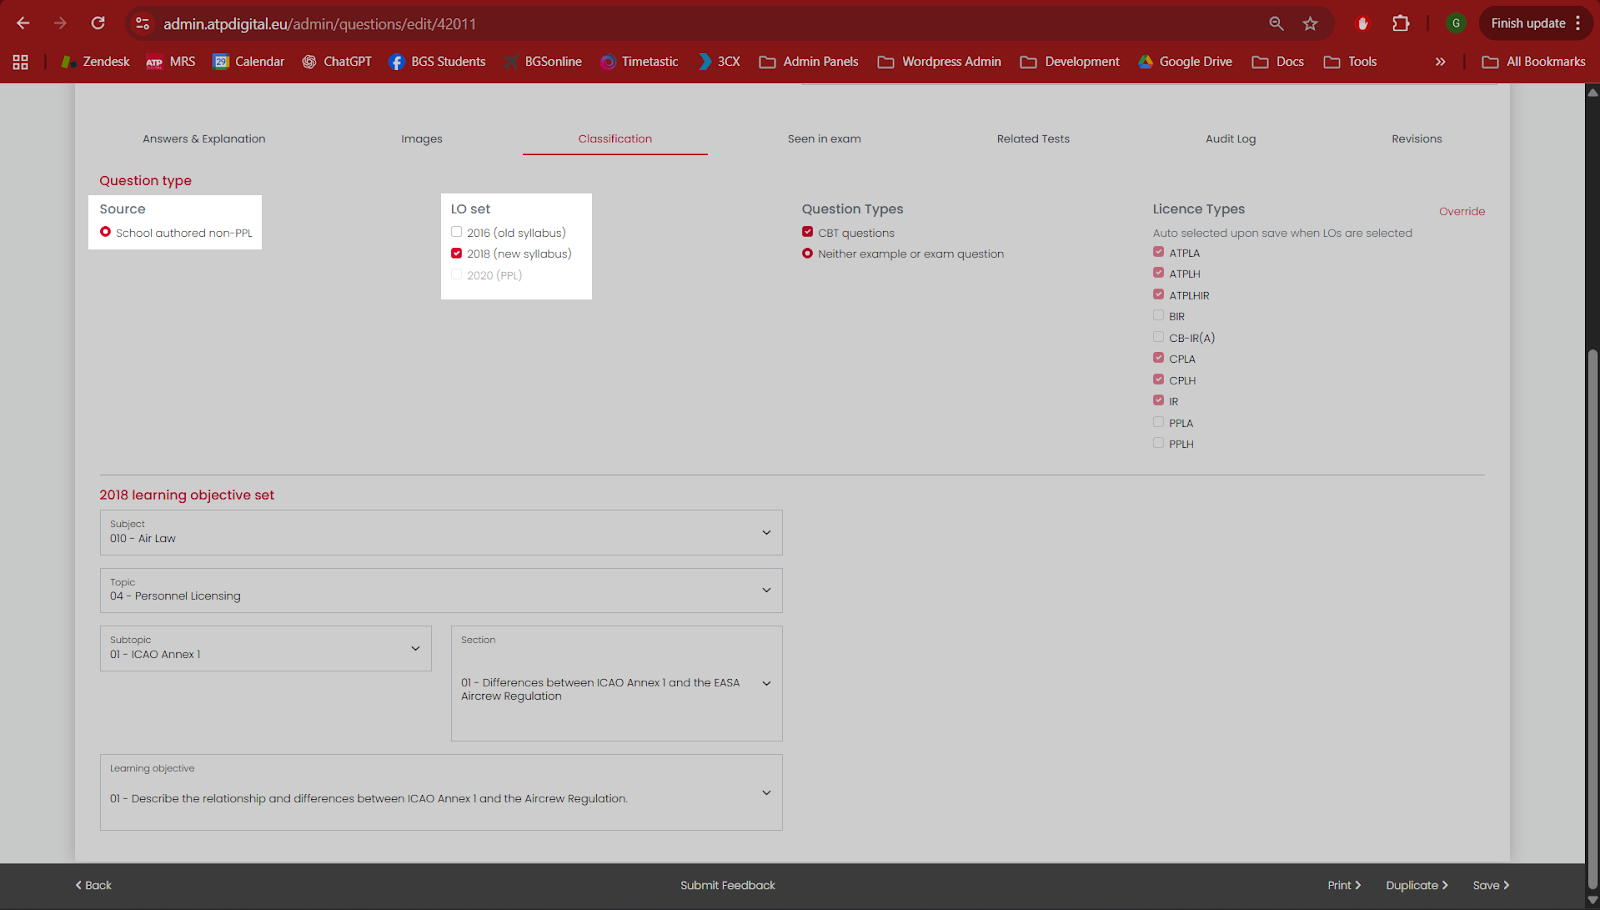
(As you are creating a question for your school, “School authored non-PPL” will be the only Source selectable)
Once you have selected these two, you can move down to the LO classification below
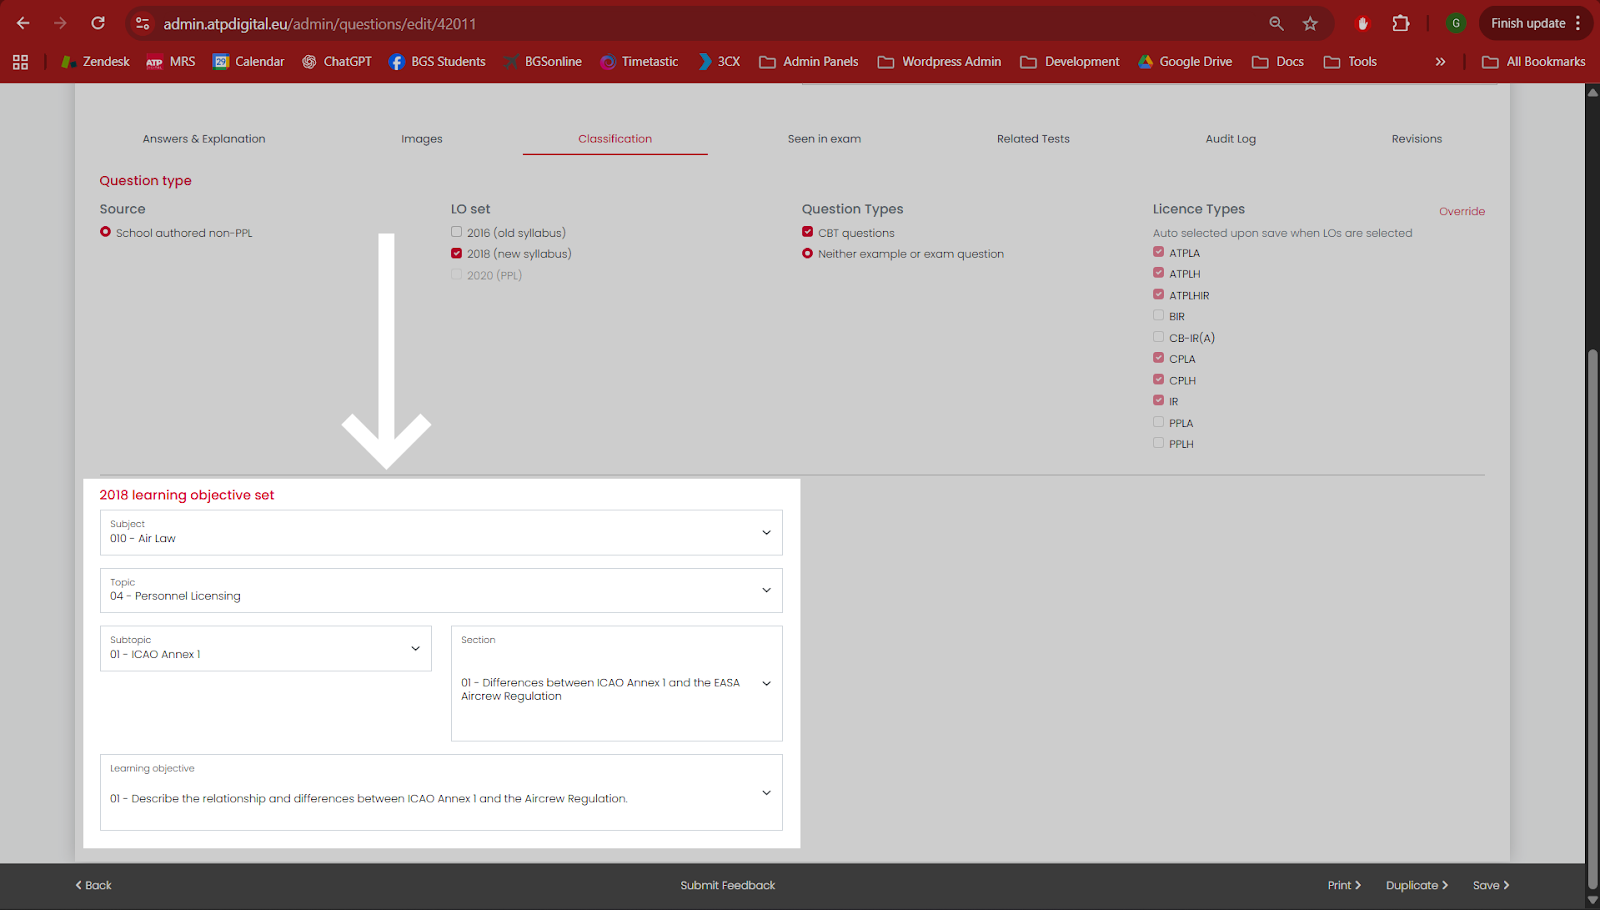
Select a Subject and Topic from the drop-down options.
The Learning Objective, Section and Subtopic are optional, but refer to the EASA Learning Objective number. E.g., from the 2018 syllabus:
| 010 00 00 00 | AIR LAW |
| 010 04 00 00 | Personal Licensing |
| 010 04 01 00 | ICAO Annex 1 |
| 010 04 01 01 | Differences between ICAO Annex 1 and the EASA Aircrew Regulation |
| 010 04 01 01 (01) | Describe the relationship and differences between ICAO Annex 1 and the Aircrew Regulation |
Would be categorised in the MRS as:
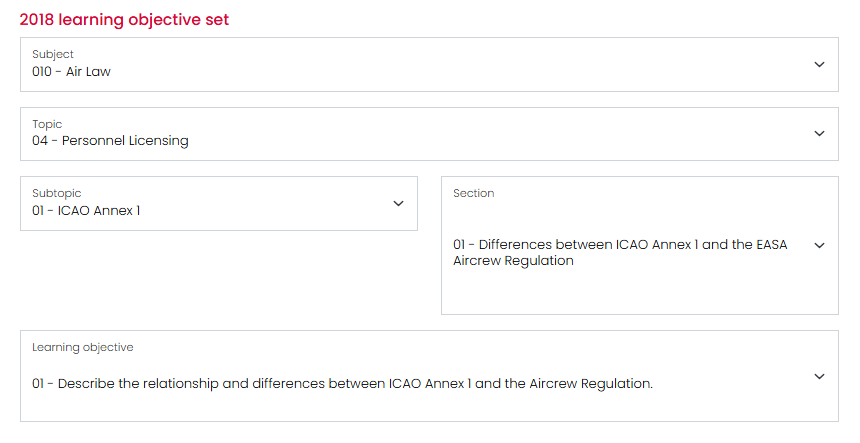
Once you have classified a question with an LO, it will automatically populate the licence types that the LO is associated with.
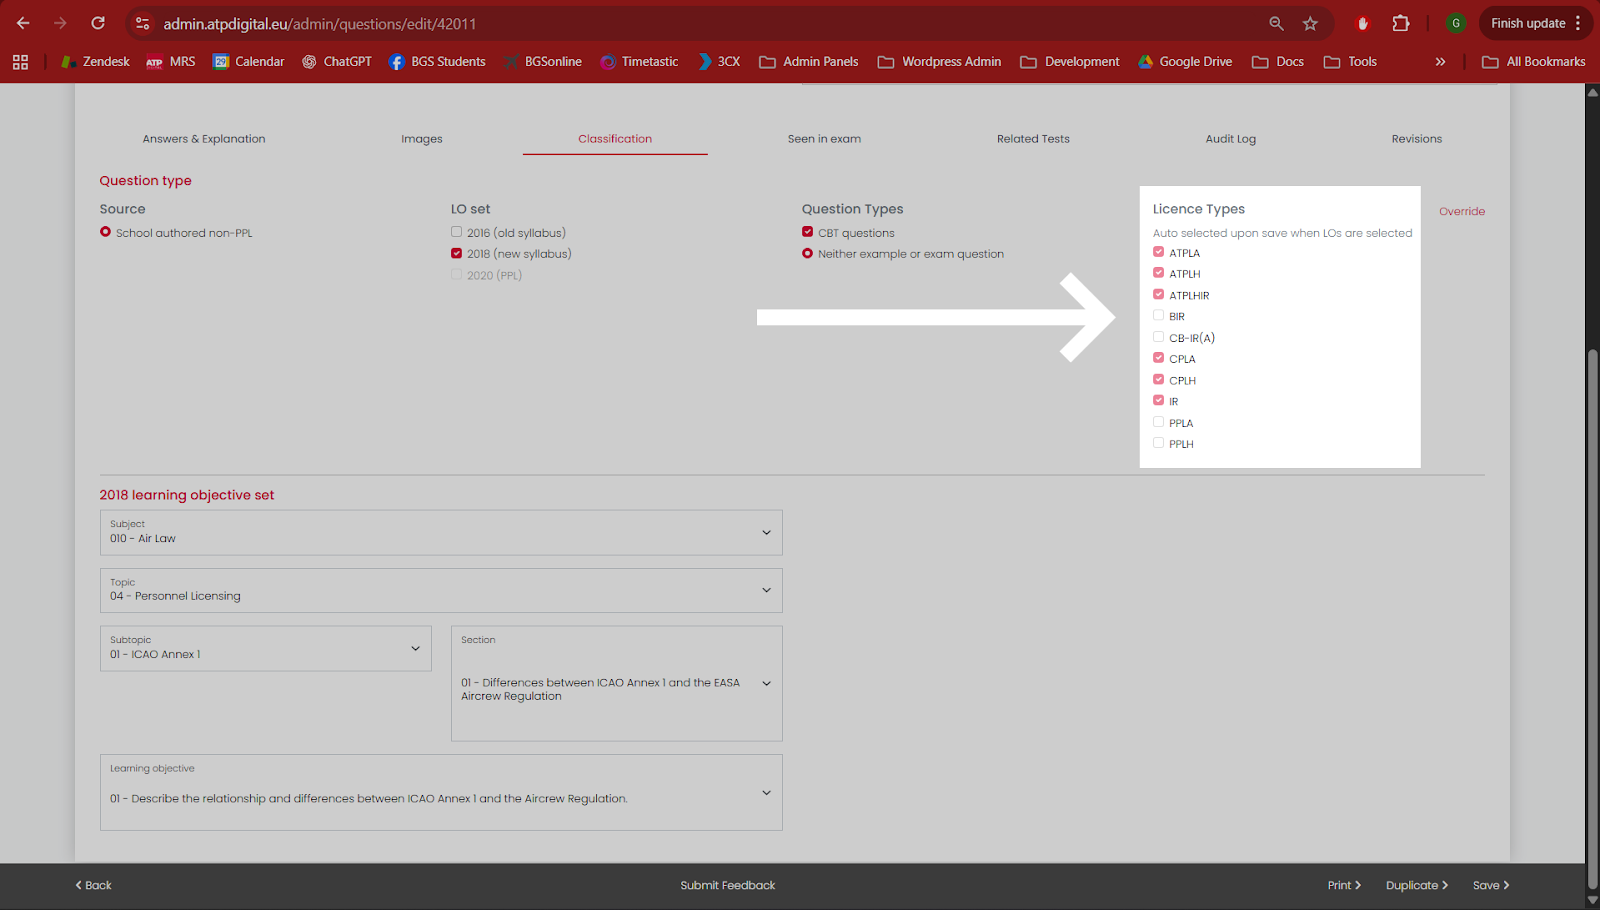
If you would like to skip the LO classification or change the automatic licence type classification, you can click “Override” next to the Licence Types, and this will allow you to manually check which licence types you would like the question to be available to.
When you are satisfied with your question and selections, click on the Create button at the bottom right of the screen.
If you are a Question Authoriser as well as a Question Editor, you will be given the option to Approve the question as you create it. If you are a Question Editor only, or you want someone else to check the question before it goes live, there is an approval step that is explained below.
Editing an existing School Question
Editing is straightforward. Make the changes you want to, then press the “Save” button at the bottom of the screen.
Approving a question
If a question has been created by a Question Editor who is not also a Question Approver, a Question Approver will need to approve the question before it can be added to tests. To do this, open the question and click on “Save.”
When saving the question, add some text for the audit log and ensure that “Approved” is checked before saving
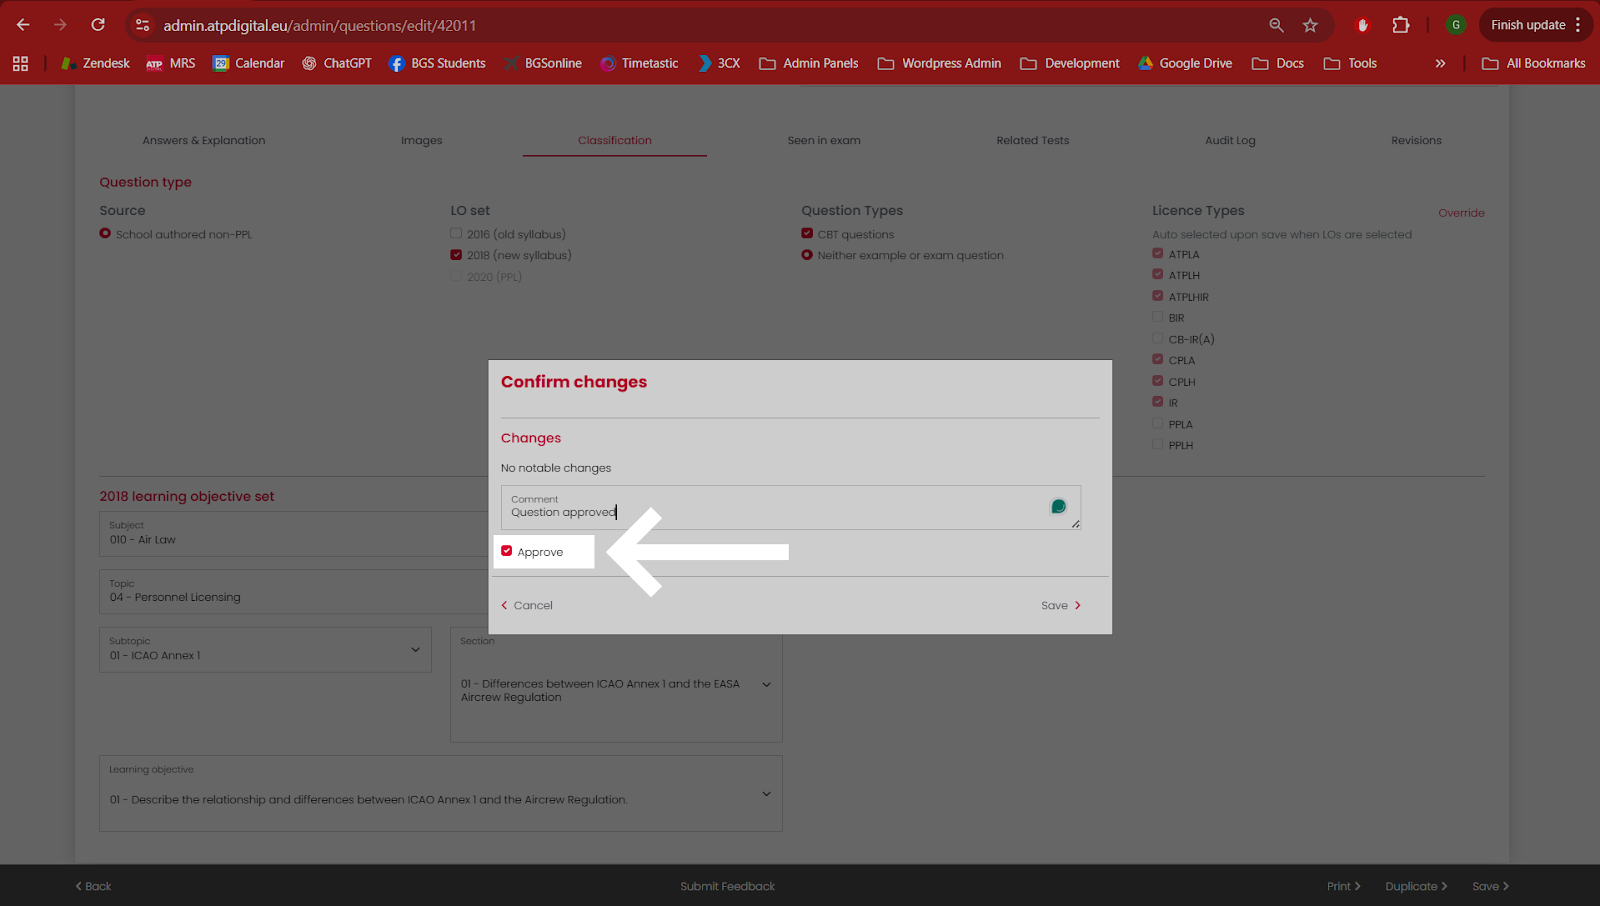
Once the question has been saved by a Question Approver, it will be available for inclusion in your Fixed Tests.
If you have any questions or would like assistance setting up questions for your school, please contact [email protected] or [email protected] who will be happy to help.